


I recently did a set of stories on my Instagram account that people seemed to like, so I thought I’d turn it into a blog post for you. The topic? How to have a super an obsessively cohesive Instagram grid in 3 steps. This is, of course, a simplification of the process, but gets you familiar with what the 3 main steps are. Without further ado…
Step 1 – Plan Ahead
Choose a colour palette that is based on colours that you like, naturally appear in your life and/or content strategy, and drive your brand (either personal or company) where you want it to go.
I select locations and items to include in my content based on my current colour palette.

My Current Colour Palette
I pretty much have a colour palette for my life. Crazy, I know.
I’m the kind of person though who goes through phases of liking certain colours. So when I do buy new clothing, planners, office supplies, etc, they tend to be from the same colour group.
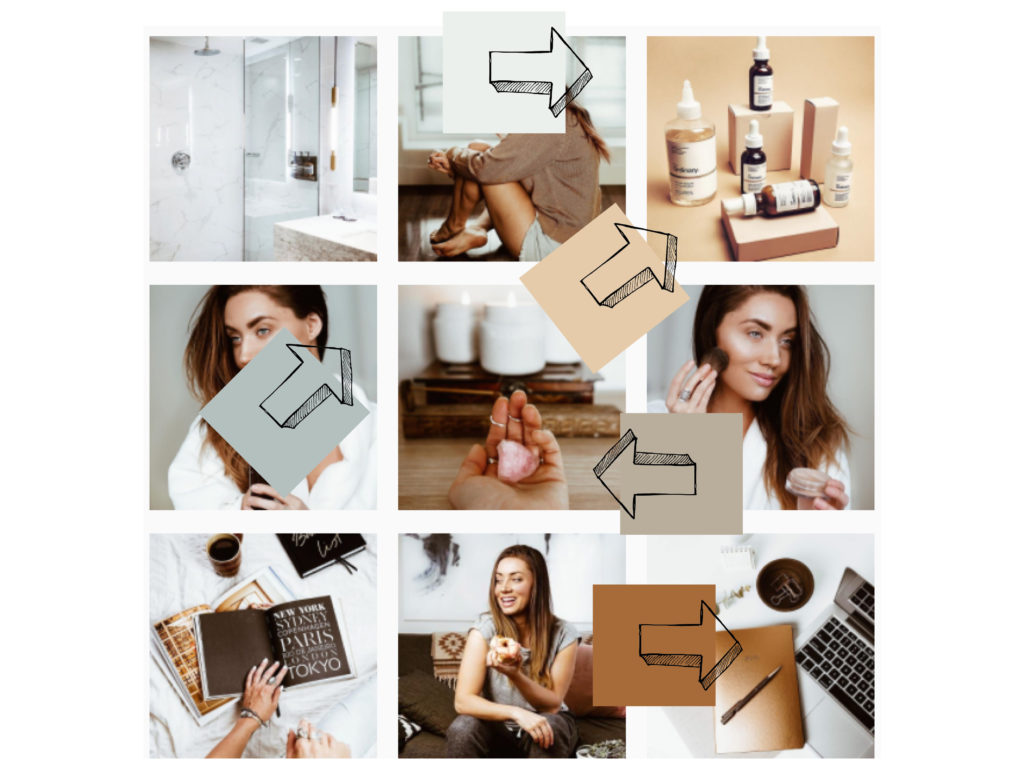
Don’t stress too much about picking “the perfect” colour theme though. You can always change it. I tend to change mine every few months based on season, travel destinations, etc.
Step 2 – Edit
Editing your photos contributes to even further cohesion. I edit with Adobe Lightroom because I can adjust the hue, saturation, and luminance of each colour. For example, this means that I can make two different hues of blue in two different images look identical through editing.
I also save my settings as presets and apply them to future photos to ensure consistency and speed when editing.
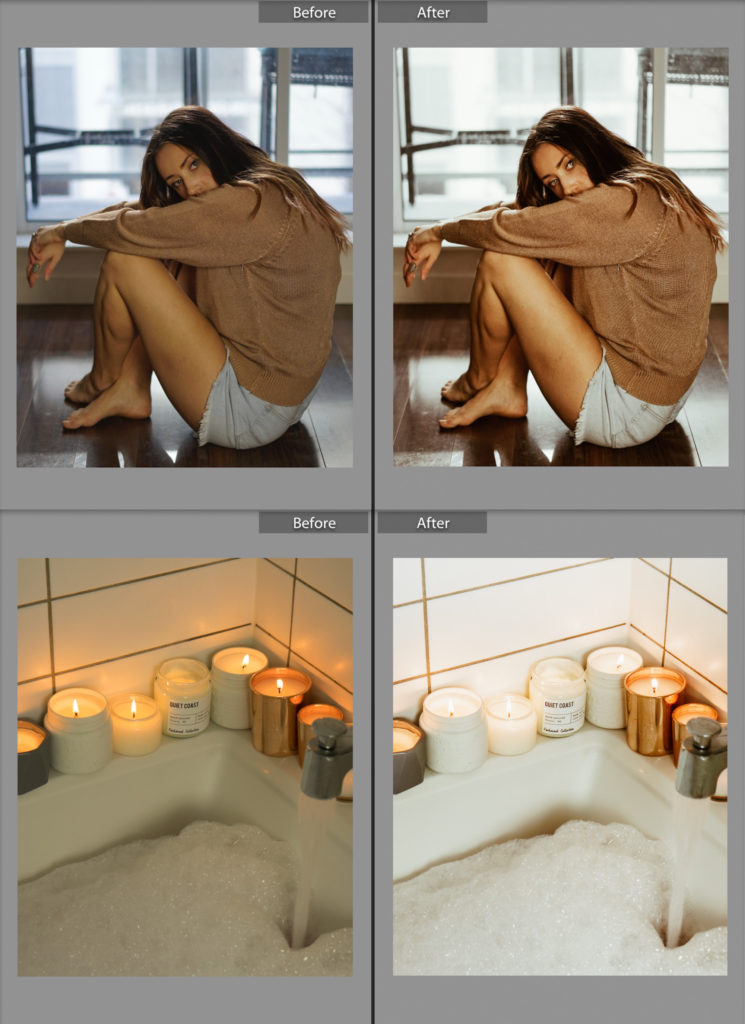
My current Lightroom Presets that I use. © Caley Dimmock
Want my current Lightroom presets as pictured above? [button text=”Yes please!” url=”https://caleydimmock.com/downloads/hot-cold-lightroom-preset-bundle/”]
Step 3 – Lay it Out
I always check to see what my grid will look like with a new post before I publish it. There are so many apps out there that you can do this with now. My favourite is Snug – mostly because it’s simple AF. I believe it’s only available for iPhone, but there are a ton of alternatives for Android such as Preview and Planoly (both of which are also available for iOS).
And that’s the gist of it.
Thanks for reading! I know this was a quick blog post – but it’s the easiest way to provide an overview of my process. If you do want to learn more in-depth about visual branding and Instagram, just shoot me a message on my contact page to inquire about my ‘brain picking’ sessions (AKA 1-on-1 consulting sessions), or take a peep at my in-depth online course, Instabrand Me, which is all about building a personal brand on Instagram that you can leverage.


+ show Comments
- Hide Comments
add a comment